[Vagrant & VirtualBox] VirtualBox: VBoxManage を使って VM の登録と snapshot をとる
VBoxManage を知ったので、手作業で登録していた部分を変更してみます。
[markdown]
こちらで行っていた作業を自動化していきます。
> * [MacにIEテスト環境を作る(ievms 編) | deadwood](https://www.d-wood.com/blog/2014/04/24_6085.html)
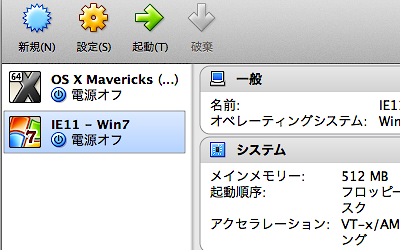
## VBoxManage import で .ova を登録する
しばらく待ち時間がありましたが、無事登録完了。
> * [Chapter 8. VBoxManage](http://www.virtualbox.org/manual/ch08.html#vboxmanage-import)
“`prettyprinted
% VBoxManage import IE11\ -\ Win7.ova
0%…10%…20%…30%…40%…50%…60%…70%…80%…90%…100%
Interpreting /private/tmp/IE11 – Win7.ova…
OK.
Disks: vmdisk1 136365211648 -1 http://www.vmware.com/interfaces/specifications/vmdk.html#streamOptimized IE11 – Win7-disk1.vmdk -1 -1
Virtual system 0:
0: Suggested OS type: “Windows7”
(change with “–vsys 0 –ostype
1: Suggested VM name “IE11 – Win7”
(change with “–vsys 0 –vmname
2: Number of CPUs: 1
(change with “–vsys 0 –cpus
3: Guest memory: 512 MB
(change with “–vsys 0 –memory
4: Sound card (appliance expects “”, can change on import)
(disable with “–vsys 0 –unit 4 –ignore”)
5: USB controller
(disable with “–vsys 0 –unit 5 –ignore”)
6: Network adapter: orig NAT, config 3, extra slot=0;type=NAT
7: CD-ROM
(disable with “–vsys 0 –unit 7 –ignore”)
8: IDE controller, type PIIX4
(disable with “–vsys 0 –unit 8 –ignore”)
9: IDE controller, type PIIX4
(disable with “–vsys 0 –unit 9 –ignore”)
10: SATA controller, type AHCI
(disable with “–vsys 0 –unit 10 –ignore”)
11: Hard disk image: source image=IE11 – Win7-disk1.vmdk, target path=/Users/****/VirtualBox VMs/IE11 – Win7/IE11 – Win7-disk1.vmdk, controller=8;channel=0
(change target path with “–vsys 0 –unit 11 –disk path”;
disable with “–vsys 0 –unit 11 –ignore”)
0%…10%…20%…30%…40%…50%…60%…70%…80%…90%…100%
Successfully imported the appliance.
“`
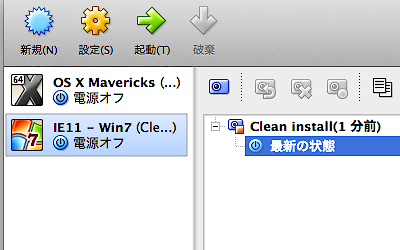
## VBoxManage snapshot で仮想マシンのスナップショットをとる
> * [Chapter 8. VBoxManage](http://www.virtualbox.org/manual/ch08.html#idp58714080)
> * [VBoxManage snapshotコマンド | VirtualBox Mania](http://vboxmania.net/content/vboxmanage-snapshot%E3%82%B3%E3%83%9E%E3%83%B3%E3%83%89)
> * [VirtualBox の VM をコマンドラインから管理する – Qiita](http://qiita.com/zakkied/items/abf43c69fae92e4c5207)
“`prettyprinted
% VBoxManage snapshot “IE11 – Win7” take “Clean install”
0%…10%…20%…30%…40%…50%…60%…70%…80%…90%…100%
“`
## まとめ
こんなシェルスクリプトの内容で、いまの状態であれば Modern.IE ファイルのダウンロードと登録を済ますことができるようになりました。
“`bash:setup.sh
#!/bin/bash
pushd /tmp
curl -O -L “http://www.modern.ie/vmdownload?platform=mac&virtPlatform=virtualbox&browserOS=IE11-Win7&parts=4&filename=VMBuild_20131127/VirtualBox/IE11_Win7/Mac/IE11.Win7.For.MacVirtualBox.part{1.sfx,2.rar,3.rar,4.rar}”
chmod +x IE11.Win7.For.MacVirtualBox.part1.sfx
./IE11.Win7.For.MacVirtualBox.part1.sfx
VBoxManage import IE11\ -\ Win7.ova
VBoxManage snapshot “IE11 – Win7” take “Clean install”
popd
exit 0
“`
残りの作業は、日本語入力の設定のみですかね。
コントロールパネルから言語を追加することで入力可能となります。
* 「Setting」→「Control Panel」→「Add language」で日本語を選択。
> * [MacにIEテスト環境を作る(ievms 編) | deadwood](https://www.d-wood.com/blog/2014/04/24_6085.html)
> * [MacにIEテスト環境を作る(VirtualBox 編) | deadwood](https://www.d-wood.com/blog/2014/01/27_5343.html)
VM まわりは、ここにまとめていくことにする。
> * [DriftwoodJP/VMs](https://github.com/DriftwoodJP/VMs)
[/markdown]