[Ruby on Rails 3, Ruby on Rails 4] Ubuntu に Passenger + MySQL で Rails 4 を動かす(1)
以前に作ったVMをもとに設定を続けてみます。
[markdown]
> * [Ubuntu に rbenv + Bundler で Rails 4 をインストールする | deadwood](https://www.d-wood.com/blog/2013/09/25_4699.html)
こちらを参考にさせて頂きました。
> * [ApacheとPhusion Passengerのセットアップ – Ruby on Rails with OIAX](http://www.oiax.jp/rails3book/setup_phusion_passenger.html)
> * [Mac OS X 10.7.5 (LION)でRuby on Railsの簡易アプリを作成してみる – 完熟トマト](http://kanjuku-tomato.blogspot.jp/2013/01/mac-os-x-1075-lionruby-on-railsweb.html)
> * [さくらVPS/entOS 6.4 Passengerのインストール手順 [Apache][Railsサーバへの道] – 酒と泪とRubyとRailsと](http://morizyun.github.io/blog/passenger-install-apache-ruby-rails/)
> * [Apache2+PassengerでRailsを動かす – アーユーレディ?](http://atsm.hateblo.jp/entry/20110519/1305778496)
## Apache2, MySQL のインストール
“`
$ sudo apt-get install apache2 libmysqlclient-dev mysql-server
“`
## Passenger のインストール
“`
$ gem install passenger
Fetching: daemon_controller-1.1.5.gem (100%)
Successfully installed daemon_controller-1.1.5
Fetching: passenger-4.0.19.gem (100%)
Building native extensions. This could take a while…
Successfully installed passenger-4.0.19
2 gems installed
“`
## Passenger Apache module のインストール
インストーラーが立ち上がります。
“`
$ passenger-install-apache2-module
Welcome to the Phusion Passenger Apache 2 module installer, v4.0.19.
# 省略
“`
進めると、不足パッケージがインストール方法とともに表示される。
親切。
“`
Installation instructions for required software
* To install Curl development headers with SSL support:
Please run apt-get install libcurl4-openssl-dev or libcurl4-gnutls-dev, whichever you prefer.
* To install Apache 2 development headers:
Please install it with apt-get install apache2-threaded-dev
* To install Apache Portable Runtime (APR) development headers:
Please install it with apt-get install libapr1-dev
* To install Apache Portable Runtime Utility (APU) development headers:
Please install it with apt-get install libaprutil1-dev
If the aforementioned instructions didn’t solve your problem, then please take
a look at the Users Guide:
/home/vagrant/.rbenv/versions/2.0.0-p247/lib/ruby/gems/2.0.0/gems/passenger-4.0.19/doc/Users guide Apache.html
“`
インストールしたら、再度実行する。
“`
$ passenger-install-apache2-module
“`
Apache に追加する設定が表示されるのでメモします。
“`
The Apache 2 module was successfully installed.
Please edit your Apache configuration file, and add these lines:
LoadModule passenger_module /home/vagrant/.rbenv/versions/2.0.0-p247/lib/ruby/gems/2.0.0/gems/passenger-4.0.19/buildout/apache2/mod_passenger.so
PassengerRoot /home/vagrant/.rbenv/versions/2.0.0-p247/lib/ruby/gems/2.0.0/gems/passenger-4.0.19
PassengerDefaultRuby /home/vagrant/.rbenv/versions/2.0.0-p247/bin/ruby
After you restart Apache, you are ready to deploy any number of Ruby on Rails
applications on Apache, without any further Ruby on Rails-specific
configuration!
Press ENTER to continue.
“`
“`
Deploying a Ruby on Rails application: an example
Suppose you have a Rails application in /somewhere. Add a virtual host to your
Apache configuration file and set its DocumentRoot to /somewhere/public:
ServerName www.yourhost.com
# !!! Be sure to point DocumentRoot to ‘public’!
DocumentRoot /somewhere/public
# This relaxes Apache security settings.
AllowOverride all
# MultiViews must be turned off.
Options -MultiViews
And that’s it! You may also want to check the Users Guide for security and
optimization tips, troubleshooting and other useful information:
/home/vagrant/.rbenv/versions/2.0.0-p247/lib/ruby/gems/2.0.0/gems/passenger-4.0.19/doc/Users guide Apache.html
Enjoy Phusion Passenger, a product of Phusion (www.phusion.nl) 🙂
https://www.phusionpassenger.com
Phusion Passenger is a trademark of Hongli Lai & Ninh Bui.
“`
## Apacheの設定
先日、WEBrick で動かしてみた下記のプロジェクトをPassengerで動くようにしていきます。
> * [Ubuntu に rbenv + Bundler で Rails 4 をインストールする | deadwood](https://www.d-wood.com/blog/2013/09/25_4699.html)
http://192.168.33.11:3000/users
/home/vagrant/work/sample
### Apacheの動作確認
`sudo /etc/init.d/apache2 restart` で、リスタートしてみます。
設定したipアドレスをブラウザで表示してみると、Apache が既に動作していることが分かりました。
“`
It works!
This is the default web page for this server.
The web server software is running but no content has been added, yet.
“`
設定ファイルがどこにあるのか調べます。
“`
$ sudo apachectl -V | grep HTTPD_ROOT
-D HTTPD_ROOT=”/etc/apache2″
$ sudo apachectl -V | grep SERVER_CONFIG_FILE
-D SERVER_CONFIG_FILE=”apache2.conf”
“`
`/etc/apache2/apache2.conf` を読んでみると、下記のような内容があったので、それぞれにメモの内容を反映させてみます。
“`
# Include all the user configurations:
Include httpd.conf
# Include the virtual host configurations:
Include sites-enabled/
“`
分からないなりにやってみます。
### Apache module の設定
`/etc/apache2/apache2.conf` に記入すれば良いようですが、分けて書けないかな。
“`
$ sudo vim /etc/apache2/httpd.conf
“`
以下を追記。
“`
LoadModule passenger_module /home/vagrant/.rbenv/versions/2.0.0-p247/lib/ruby/gems/2.0.0/gems/passenger-4.0.19/buildout/apache2/mod_passenger.so
PassengerRoot /home/vagrant/.rbenv/versions/2.0.0-p247/lib/ruby/gems/2.0.0/gems/passenger-4.0.19
PassengerDefaultRuby /home/vagrant/.rbenv/versions/2.0.0-p247/bin/ruby
“`
### Virtual Host の設定
`/etc/apache2/sites-available/default` の設定が読まれているようです。
他に用意できないか試します。
`NameVirtualHost *:80` は、`/etc/apache2/ports.conf` 内に記述がありました。
“`
$ sudo vim /etc/apache2/sites-available/passenger
“`
先に作成したサンプルアプリにあわせて書き換えます。
ServerName は、mac の /etc/hosts の記述を記載。状況に合わせて書き換えて下さい。
“`
ServerName dev.rails
# !!! Be sure to point DocumentRoot to ‘public’!
DocumentRoot /home/vagrant/work/sample/public
RailsEnv development
# RailsBaseURI /testapp/public
# This relaxes Apache security settings.
AllowOverride all
# MultiViews must be turned off.
Options -MultiViews
“`
上記設定の有効化を行い、apacheを再起動します。
このリスタートでもOK。
“`
$ sudo a2ensite passenger
$ sudo service apache2 restart
“`
> * [UbuntuTips/DedicatedServer/ApacheVirtualHost – Ubuntu Japanese Wiki](https://wiki.ubuntulinux.jp/UbuntuTips/DedicatedServer/ApacheVirtualHost)
> * [Ubuntu/Debian Apacheのインストールと設定 – omnioo lab.](http://www.omnioo.com/omnioolab/2012/09/ubuntudebian-apache.php)
* [Ruby + bundler + Rails => Hello World – Qiita [キータ]](http://qiita.com/iwot@github/items/d1487adf334e536bed15)
## 動作確認
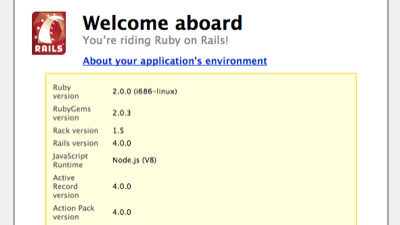
Rails 起動ページの Welcome aboard が表示できました。
http://dev.rails/
sqliteも動いています。
http://dev.rails/users
次は MySQL です。
## 補遺
### The page you were looking for doesn’t exist
> [実はPhusion Passengerは、デフォルトではproductionモードで動作するようになっています。そのため、Railsデフォルトのdevelopmentモードでしか準備していない場合はエラーになってしまうし、またエラーも抑制されて、そのまま画面に出たりしないのです。](http://d.hatena.ne.jp/ginpei/20100522/rails_on_apache)
このタイミングで確認するには、`RailsEnv development` の記述が必要でした。
### production mode で動かすには
> * [Phusion Passengerを使ってRuby on RailsをApacheで動かしてみた(Linux) – NEST :: laboratory](http://d.hatena.ne.jp/ginpei/20100522/rails_on_apache)
>
> また、逆にアプリをproductionモードで動くようにしてやっても良いでしょう。というか実際に公開するときはそうする必要がありますよね。
>
> とりあえず、DBを作ってやれば動きます。
>
> “`rake db:migrate RAILS_ENV=production“`
>
> Apacheの設定ファイルでdevelopmentモードの指定をした場合は、は元に戻して下さいね。
[/markdown]